
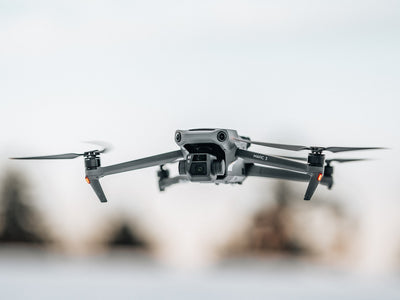
In recent years, drone photography has become increasingly popular. As a result, photographers can now offer aerial photography services for events, diversifying their portfolio and opening doors for more opportunities.
Drones have made aerial photography possible and have taken photography to a new level. It's one of the fascinating modern forms of photography, and worth exploring, especially for daring photographers who want to take their work to new heights, both literally and metaphorically. So here are some drone photography tips to help you get gorgeous, high-quality aerial images and get the most out of your drone.
Check the UAV Forecast
The first thing that a drone photographer should keep in check is the UAV Forecast. Weather conditions play an essential role in aerial photography. UAV forecasts can provide vital information for the safety of the pilot, the aircraft, and the landscape so that you won't end up crashing your drone in a skyscraper. It also gives you sufficient information to keep you aware of the restricted areas. So, for example, you will be aware of a storm before you start flying.
Shoot in RAW format
Capturing in RAW format makes it easier for a photographer to edit the picture later with various options. You acquire lossless, uncompressed image data from the sensor this way. Moreover, shooting in RAW format can attain more brightness due to the significant detail. The RAW form can also preserve resolution and allow you to make adjustments to colour without sacrificing natural flow.
Suppose you have a modular drone with interchangeable cameras. In that case, we suggest buying a new drone that will let you shoot in RAW format. Most high-end drones support shooting in RAW format.
Make Use of ATTI Mode
When flying at high altitudes, your drone may experience extreme conditions, which will cause the drone to lose its GPS signal. This condition will make the aircraft switch automatically to ATTI mode, which renders the drone unable to use GPS for virtual positioning. In this mode, the operator has to fly the drone manually, which requires expertise in the said mode. Being familiar with ATTI mode will allow you to quickly adapt to such situations and avoid possible crashes & failures.
Use the Panorama Effect
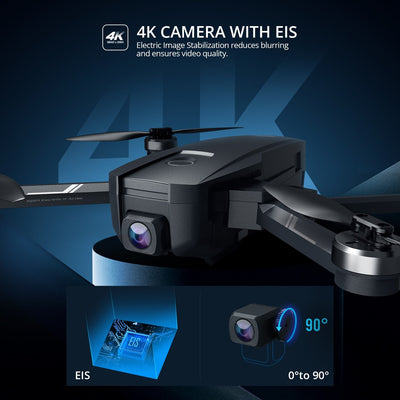
Most of the camera drones in the market today come with a relatively low resolution compared to their SLR and CSC counterparts. Low Megapixels can limit your ability to capture pictures with larger scopes. These cameras also lack capturing details, a common attribute of a good photo. However, drones like DJI Mini 2 come with 12 Megapixels, which can give you the clarity you want in a picture.
The solution to this problem is to make use of the panorama effect. For example, you can fly your drone in a coordinated pattern capturing stills for a bigger picture. You can then combine these shots using software programs such as Adobe Lightroom and create a bigger view with great details and high resolutions.
Utilise the Thirds Grid Overlay for Composition
The most significant aspect of an image is its composition. It determines visual elements within the frame, the balance of negative and positive space, and even the image's colour balance. Of course, it takes time to get the correct composition, but that's not a problem when you are using a drone with substantial battery life. However, with drones, you don't have that luxury. Most drones have a flying length of 25 to 30 minutes, so if you're aiming to record a specific location or topic, it's critical that you do it right the first time.
It is better to adjust to the correct composition before capturing the photo. For example, suppose you rely on cropping and rotating the image in post-production. In that case, you will lose precious pixels to correct the composition.
Make sure to frame your photographs with the help of the thirds grid overlay to ensure that they are appropriately composed. Drone cameras frequently come with a thirds grid to help users frame their photographs more appropriately, resulting in better compositions. In addition, if you can use an overlay grid, it helps you prevent excessive cropping in post-production.
Use ND Filters
ND [Neutral-density] filters are among the most tried-and-true tools for managing light. ND filters make long exposures feasible in any light condition. They may appear simple, but they're essential for creating photographic effects challenging to achieve in post-production.
An ND filter is a darkened piece of glass placed over the front of a camera lens. Neutral-density filters help to reduce the amount of light that reaches the camera sensor, allowing for longer shutter speeds. In addition, it is made of high-quality elements to maintain clarity. ND filter enables the creation of long-exposure effects such as smooth water, traffic trails, and ghost crowds at any time of the day.
PolarPro Cinema Series for Mavic Air 2
Polar Pro ND filters come with a set of high-grade glass and coatings for great cinematic shots and perfect optics. The VND Collection for the Mavic Air 2 contains 2-5 and 6-9 stops. These filters aid in reducing shutter speeds, removing glare, and increasing colour saturation. The PolarPro Cinema Series is perfect for partly cloudy to bright weather conditions.

Leave a comment